
Dry Yeast Crusty Bread That You Can Score
Dry Yeast Crusty Bread That You Can Score
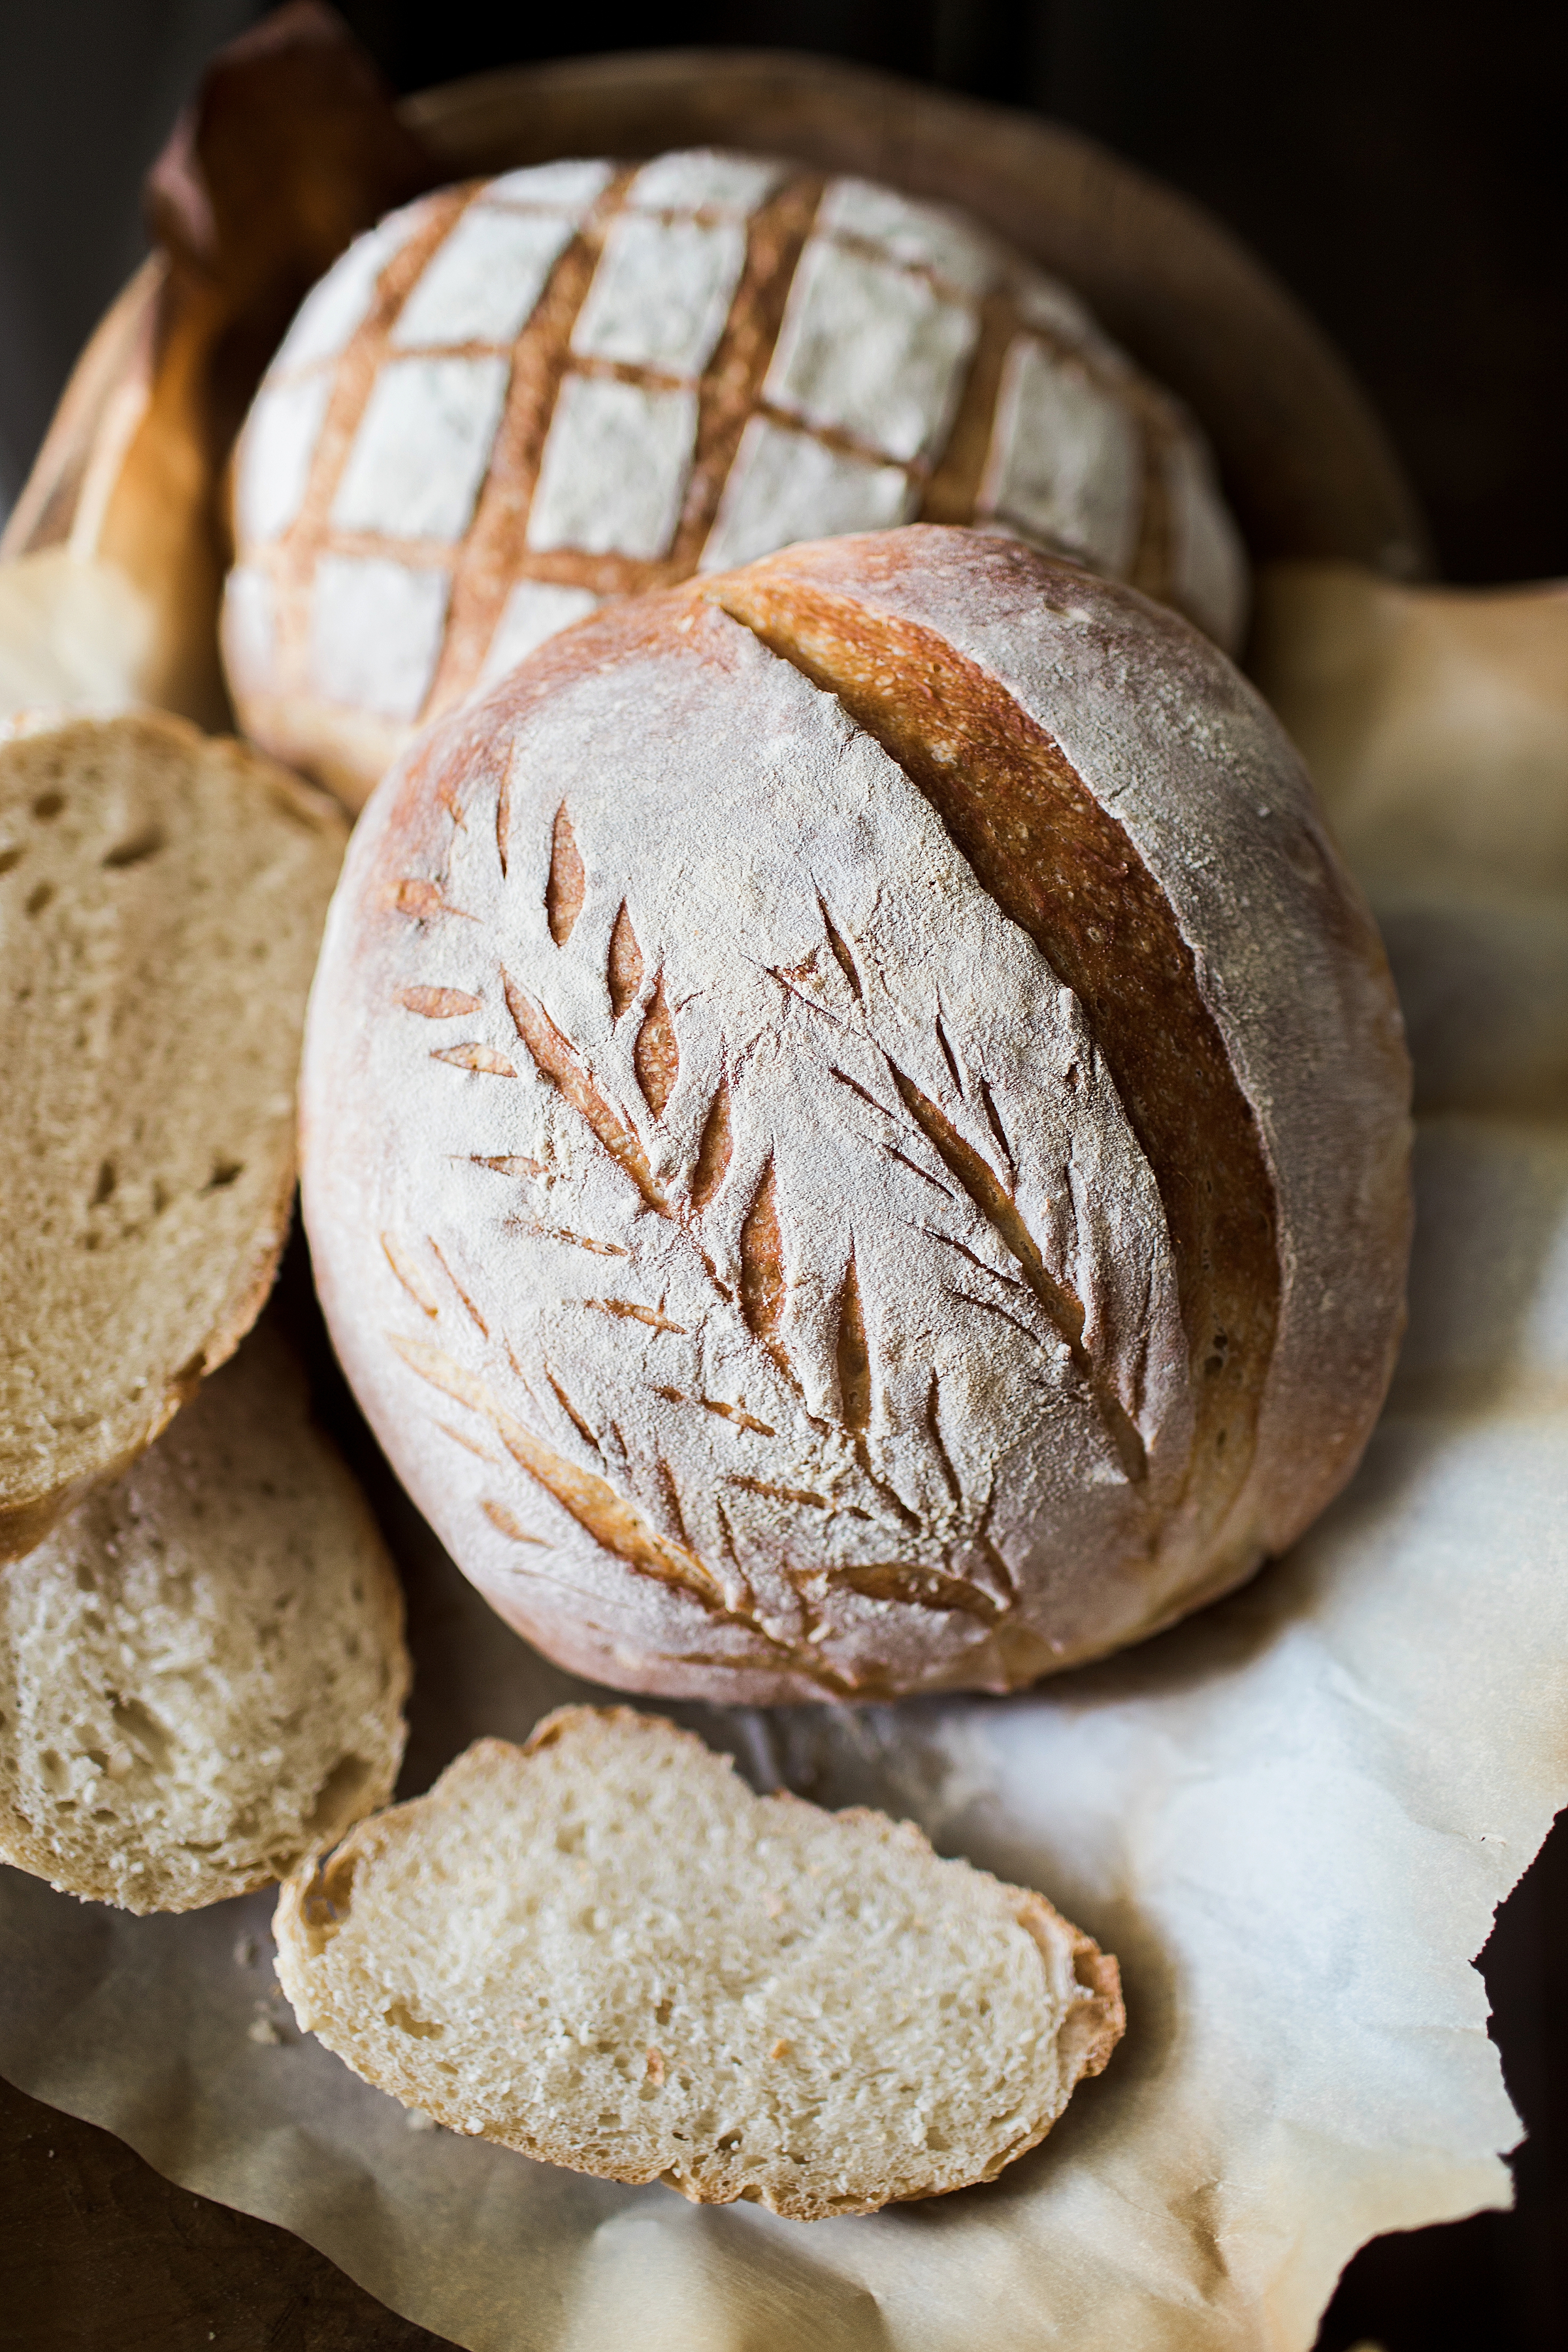
Combining my knowledge of sourdough bread baking and dry yeast loaves, I’ve come up with the perfect crusty artisan bread. A dough that you can actually score! It bakes up a nice and airy crumb with a crunchy exterior just like your best sourdough loaves. So if you aren’t ready to dive into sourdough bread baking and starter care or maybe you don’t like the tang of sourdough, you’re in luck. This recipe is quick, it’s simple with just a few ingredients, and it’s the perfect bread for all your sandwich and dinner bread needs! You will need the following bread baking tools:
- Dutch Oven
- Proofing Baskets coated with rice flour
- A bread lame
Ingredients:
- 2 cups warm water + 1/2 cup
- 2 tspn instant dry yeast
- 5 cups bread flour (I use King Arthur)
- 2 tspn salt
Directions:
- In a measuring glass, stir together the yeast and 2 cups of warm water. Set aside to activate for about 5-10 minutes or until yeast shows signs of activity.
- In a large mixing bowl, stir together the bread flour and salt. Add the yeast and water mixture and mix together with your hands until a shaggy dough forms. Add another 1/2 cup of water and mix by squeezing and kneading the dough with your hands until all the water is incorporated and a very sticky dough forms. Cover the bowl with a tea towel and let rise for 30 minutes.
- Prepare two proofing baskets. I spritz them with water and coat with rice flour for the perfect non-stick surface. Let them dry well before use. You do not need to clean them between uses. Be sure to add more flour over time to areas that become uncoated.
- Knead the dough by folding the dough over onto itself a total of 24 times. To do this, grab the dough at the 12:00 position in the bowl and pull it away from the dough before pinching it back into the center. Turn the bowl 45 degrees and repeat this fold. Continue turning and folding the dough a total of 24 times. Re-cover the bowl with the tea towel and let rise for 30 minutes.
- Repeat the same 24 folds from step 4. Turn out onto a floured surface and divide into 2 equal parts using a pastry knife.
- Shape the dough. For this step, I like to shape my dough using the same envelope fold method from steps 4 and 5. Give the dough a good jiggle as you pull the dough away from itself and fold in by pinching the dough together. Do this for all 4 sides and then any corners that are out of shape. This creates a tighter surface tension on the other side of the dough for when we go to score it. Make sure the seams are pinched together securely and carefully transfer the dough to a prepared proofing basket, seam side up. Cover with a tea towel and repeat with the other dough.
- Proof in a warm spot for 45 minutes or until your finger print doesn’t bounce back when you leave an indent on the dough surface. If you underproof, the dough will be very hard to score, if you overproof, the loaf will bake flat and dense. While they proof, preheat a Dutch oven with the lid on in the oven to 500F.
- If you want to make an intricate score design, try freezing your dough in the covered proofing basket for an additional 30 minutes.
- Score and bake your loaves. Cut a piece of wax paper large enough to use as handles to transfer your dough to the Dutch oven. Place the wax paper on top of the uncovered proofing basket and flip your dough gently but quickly to the wax paper. Support this with your hands the best you can so that the dough doesn’t deflate. Add a dusting of flour to the top of the dough and then score your design. Try to include a large deep cut into your design to give the dough a place to expand.
- Using the wax paper as a lift, transfer dough #1 to the dutch oven, cover and bake for 20 minutes undisturbed. Do not peek as you will let out all the steam!
- Lower the temperature to 450F and continue to bake for an additional 10 minutes. Remove the lid and continue to bake for another 5 minutes to give the crust a crispy shell.
- Carefully remove the loaf and repeat the same baking steps for your 2nd dough.
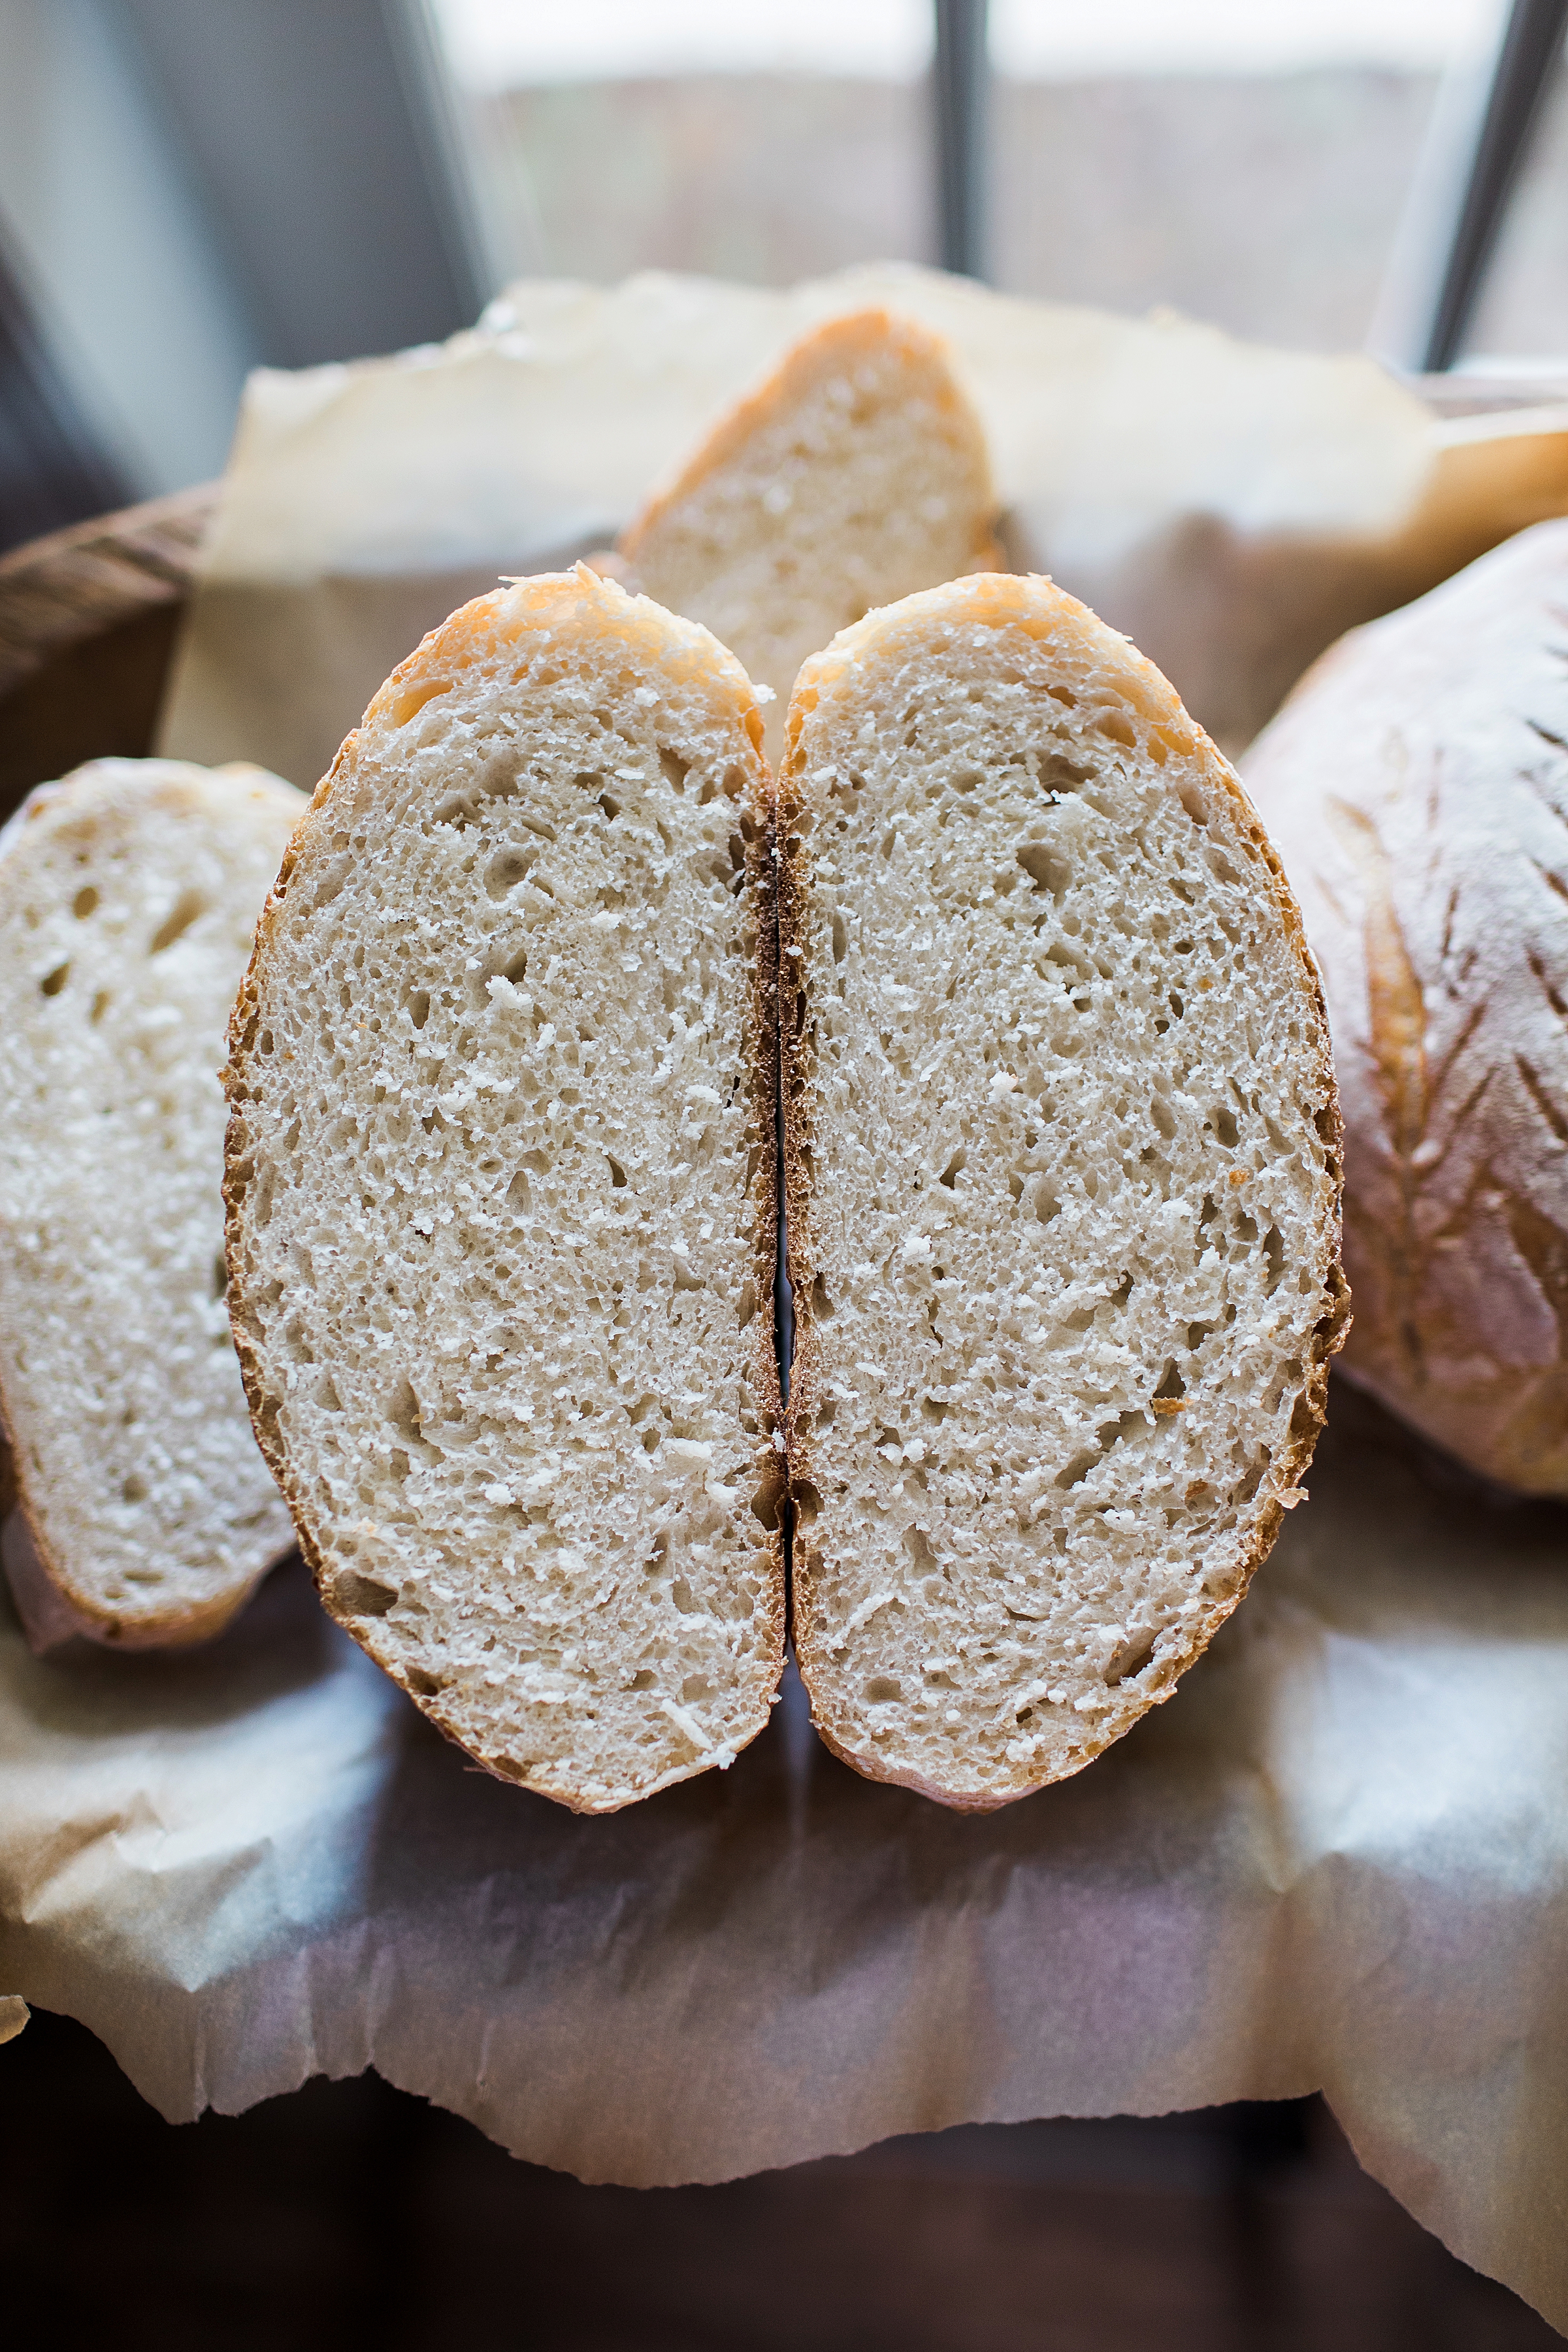
- There is nothing like freshly baked bread. But try to let it cool for a few minutes before cutting into it with a bread knife so you don’t burn yourself.
- Keep your baked bread on the counter covered with a tea towel or in a paper bag. To warm and re-crisp, I like to slice and toast! It’s simply the very best toast, ever!!!